
Overview of Reduction Steps
For MIRC-X 6T data obtained after the MIRC-X commissioning in June 2017, please use the MIRC-X python reduction pipeline and follow the instructions in the MIRC-X Pipeline User Manual.
The pipeline to reduce older MIRC data was written by John Monnier in IDL. The pipeline and the archive of coadded MIRC data are available on the Remote Data Reduction Machine in Alanta. The source code is maintained at the University of Michigan through the Subversion control system.
There are three versions of the MIRC pipeline installed on the Remote Data Reduction Machine. They are called using the following IDL startup scripts:
- mirc6b_idl: Starts pipeline_mirc6b that reduces MIRC 6T data and accounts for cross-talk.
- mirc6T_idl: Starts pipeline_mirc6 that reduces MIRC 6T data. It does not account for cross-talk.
- mirc4T_idl: Starts pipeline_v2 that reduces MIRC 4T data.
John Monnier has created an IDL mircx_cal.script routine to calibrate MIRC-X/MYSTIC data. The data would be processed using the standard mircx_reduce.py, but then mircx_cal.script could be used instead of mircx_calibrate.py. To use the IDL calibration routine enter the following startup script and follow the instructions for the calibration step described at the bottom of the page:
- mircx_idl: Starts pipeline that can be used to calibrate mircx/mystic data. Note that mircx_reduce.py must be used before running mircx_cal.script. You will need to create mircx_aliasfile.txt and mircx_calibrators.txt before running mircx_cal.script (see descriptions below).
Below is a listing of the steps to run when reducing 6T or 4T MIRC data. Each step is described in more detail in the sections below.
MIRC 6T Data (with photometric channels: 2011 July - 2017 May)
To reduce MIRC 6T data, use the mirc6b_idl or mirc6T_idl startup procedures. The 6b version of the pipeline is recommended, especially for bright resolved targets, because it accounts for cross-talk between baselines. The 6b version takes longer to run.
- $ mirc6b_idl
- IDL> mirclog, date='2011Sep29', coadd_path='/dbstorage/mircs/MIRC_COADDp/', /verbose
- IDL> .r mirc_process2.script
- IDL> .r mirc_process3.script
- IDL> .r mirc_process4.script
- IDL> .r mirc_process5.script
- IDL> .r mirc_average_sigclip.script ---OR--- IDL> .r mirc_average.script
- IDL> .r mirc_cal.script
MIRC 4T Data (No photometric channels: 2006 June - 2009Aug; With photometric channels: 2009Aug23 - 2011Jan19)
To reduce MIRC 4T data, use the mirc4T_idl startup procedure.
- $ mirc4T_idl
- IDL> mirclog, date='2010Nov05', coadd_path='/dbstorage/mircs/MIRC_COADDp/', /verbose
- IDL> .r mirc_process2.script
- If NO XCHANS then run IDL> .r mirc_process3.script
- If XCHANS then run IDL> .r mirc_process3xchan.script
- IDL> .r mirc_process4.script
- IDL> .r mirc_process5.script
- IDL> exit
- The last two steps need be run using the pipeline_mirc6 (not 6b) startup file:
- $ mirc6T_idl
- IDL> .r mirc_average_sigclip.script ---OR--- IDL> .r mirc_average.script
- IDL> .r mirc_cal.script
Additional Files Needed to Reduce MIRC 4T data:
- For data prior to UT 2009Aug23 without photometric channels, the photometry for each beam was monitored by spinning chopper blades at different frequencies in front of each beam. For some of these dates, synchronization of the choppers were time tagged by DAQ synchronization. The DAQ synchronization files are not yet in the Atlanta archives, so check with John Monnier to see if the DAQ files exist in the Michigan archives. If these files exist, the DAQ sync data path is identified by a DAQDIR line added to the mirclog file.
- When running mirc process 3, the pipeline will query the user for a comboinfo.idlvar file. For H-PRISM data obtained with MIRC, please download the linked template comboinfo file to load as an initial guess for the wavelength solution. The pipeline then solves for the wavelength solution more precisely for the given night. After downloading the template, rename the file using the appropriate UT date for the data that is being reduced and place it in the working directory. That way the pipeline will overwrite the old file with the updated solution.
Locating the Coadded MIRC Data
Coadded MIRC data are available on the Remote Data Reduction Machine in Atlanta in the following location:
/dbstorage/mircs/MIRC_COADDp
These data have been already run through mirc_process1.script which does the following steps:
- Remove unused quadrants (keeps two quadrants for fringe data and photometric channels).
- Coadd nreads.
- Sigma filter the difference frames, but restack so the data look like raw data.
- Look for data dropouts and add keyword BADFLAG to header (=0 for OK or 1 for bad).
- Output files to MIRC_COADD directory.
- Add line to header regarding saturation estimate.
For data obtained between UT 2013 Apr 19 and 2013 Aug 01, use coadded data processed using mirc_process1rf.script which suppresses RF noise by subtracting signal from the neighboring quadrant. These coadded data can be found in the following location:
dbstorage/mircs/MIRC_COADDrf
Starting the MIRC IDL Pipeline
Create a working directory on the Remote Data Reduction Machine. Change directories to the working directory and start the MIRC IDL pipeline using the appropriate startup script (mirc6b_idl, mirc6T_idl, mirc4T_idl):
$ mirc6b_idl
Create MIRC Log File
Run mirclog.pro to create the .mirclog file:
IDL> mirclog, date='2011Sep29', coadd_path='/dbstorage/mircs/MIRC_COADDp/', /verbose
The .mirclog groups each target into DATA sequences and SHUTTER sequences (BG = Background; B1-B6 = single beam shutters; FG = foregrounds, light from all telescopes but no fringes).
Edit the .mirclog file by comparing to the hand-written observing logs. Copies of the scanned observing logs are available in the shared MIRC google drive. Check to make sure the beam order is correct and that the correct shutter blocks are identified for each data block. The associated shutter block is identified in the last column of each DATA line. The #Fiber Explorer notes are sometimes located at the wrong positions in the .mirclog file, so it is important to make sure that the DATA and SHUTTER sequences are identified correctly, particularly when repeated data sets are obtained on the same target. Remove any files where a beam was lost during the shutter sequences. If possible, there should not be a fiber explorer map between the data and the associated shutters.
Prior to the installation of the photometric channels (in August 2009), in addition to the DIR line for the data directory, the mirclog file should also contain a line for the DAQDIR which contains the directory path for the DAQ synchronization files for synchronized chopping.
Here is an example of an edited MIRC log file:
$ more 2011Sep29.mirclog
## MIRC Log for 2011Sep29
## Automatically created by mirclog.pro on Wed Jun 24 15:29:34 2020
## Hand-Edited by ___GHS___ on ___2020Jul06___
##
DIR   /dbstorage/mircs/MIRC_COADDp/2011Sep29/
##Source             MODE     Block  Type  Start  End    SHUTBLOCKS
## Include only one BEAM ORDER per MIRCLOG FILE !!!
BEAM_ORDER W1 S2 S1 E1 E2 W2
## Fiber Explorer
HD_25490             H_PRISM  12     DATA  1274   1333   13
HD_25490             H_PRISM  13       BG  1334   1343
HD_25490             H_PRISM  13       B1  1344   1353
HD_25490             H_PRISM  13       B2  1354   1363
HD_25490             H_PRISM  13       B3  1364   1373
HD_25490             H_PRISM  13       B4  1374   1383
HD_25490             H_PRISM  13       B5  1384   1393
HD_25490             H_PRISM  13       B6  1394   1403
HD_25490             H_PRISM  13       FG  1404   1413
##
## Fiber Explorer
HD_33256             H_PRISM  14     DATA  1414   1473   15
HD_33256             H_PRISM  15       BG  1474   1483
HD_33256             H_PRISM  15       B1  1484   1493
HD_33256             H_PRISM  15       B2  1494   1503
HD_33256             H_PRISM  15       B3  1504   1513
HD_33256             H_PRISM  15       B4  1514   1523
HD_33256             H_PRISM  15       B5  1524   1533
HD_33256             H_PRISM  15       B6  1534   1543
HD_33256             H_PRISM  15       FG  1544   1553
##
## Fiber Explorer
HD_37468             H_PRISM  16     DATA  1554   1613   17
HD_37468             H_PRISM  17       BG  1614   1623
HD_37468             H_PRISM  17       B1  1624   1633
HD_37468             H_PRISM  17       B2  1634   1643
HD_37468             H_PRISM  17       B3  1644   1653
HD_37468             H_PRISM  17       B4  1654   1663
HD_37468             H_PRISM  17       B5  1664   1673
HD_37468             H_PRISM  17       B6  1674   1683
HD_37468             H_PRISM  17       FG  1684   1703
##
## Fiber Explorer
HD_33256             H_PRISM  18     DATA  1704   1763   19
HD_33256             H_PRISM  19       BG  1764   1773
HD_33256             H_PRISM  19       B1  1774   1783
HD_33256             H_PRISM  19       B2  1784   1793
HD_33256             H_PRISM  19       B3  1794   1803
HD_33256             H_PRISM  19       B4  1804   1813
HD_33256             H_PRISM  19       B5  1814   1823
HD_33256             H_PRISM  19       B6  1824   1833
HD_33256             H_PRISM  19       FG  1834   1853
##
## Fiber Explorer
HD_37468             H_PRISM  20     DATA  1854   1913   21
HD_37468             H_PRISM  21       BG  1914   1923
HD_37468             H_PRISM  21       B1  1924   1933
HD_37468             H_PRISM  21       B2  1934   1943
HD_37468             H_PRISM  21       B3  1944   1953
HD_37468             H_PRISM  21       B4  1954   1963
HD_37468             H_PRISM  21       B5  1964   1973
HD_37468             H_PRISM  21       B6  1974   1983
HD_37468             H_PRISM  21       FG  1984   2003
Note: Data obtained earlier on this night was collected in K-band mode. Those data were edited out of the .mirclog file to process only the H_PRISM data.
Create Alias and Calibrator Files
The MIRC IDL pipeline uses the file mirc_aliasfile.txt to identify the preferred name of each target observed and mirc_calibrators.txt to specify the calibrator diameters. The format of each of these files are shown below. If a target does not appear in either of these files, then the pipeline will query the user for the necessary information.
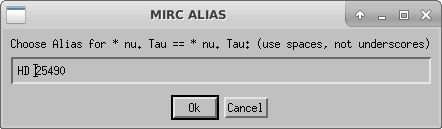
$ more mirc_aliasfile.txt
Alternative ID, MIRC ALIAS
* nu. Tau,HD 25490
HD 25490,HD 25490
* 68 Eri,HD 33256
HD 33256,HD 33256
* sig Ori,sig Ori
sig Ori,sig Ori
NOTE: Create a mirc_aliasfile.txt in your working directory containing at least the first header line "Alternative ID, MIRC ALIAS". If this file does not exist, then the mirc_process2.script will crash.
$ more mirc_calibrators.txt
HD_25490   0.599   0.020   SED_Fit_HD25490
nu_tau     0.599   0.020   SED_Fit_HD25490_nuTau
HD_33256   0.655   0.018   SED_Fit_HD33256
To reduce MIRC 4T data, you also need to create a .mircarray file that specifies which telescope is on which beam and an initial comboinfo.idlvar file. For the comboinfo file, you can download the sample idlvar file available in the link above and change the file name to the correct date. An example mircarray file for the S1E1W1W2 configuration is shown below (change the telescope configuration as needed):
$ more 2010Nov_S1E1W1W2.mircarray
## Enter Array Information  NEED TO CHECK AND EDIT, NOT SURE WHETHER IT IS THE RIGHT INFO!!!
MIRC    4
B1      S1
B2      E1
B3      W1
B4      W2
Calculate uv coverage and time information
The routine mirc_process2.script calculates the uv coverage and time information. It creates a YYYYMMMDD.idlvar file that is used during the few next steps of the pipeline.
IDL> .r mirc_process2.script
The script will ask the user to select the mirclog file:

If a target is not already in mirc_aliasfile.txt, the script will ask the user to choose an alias for each target. Remember that you need to create a file called mirc_alias.txt in your working directory that contains, at minimum, the header line "Alternative ID, MIRC ALIAS". If the mirc_alias.txt file does not exist, then the pipeline will crash.
Compute Photometry
The next step is to run mirc_process3.script to compute photometry information.
IDL> .r mirc_process3.script
Interactive (1,default) or automatic (0):
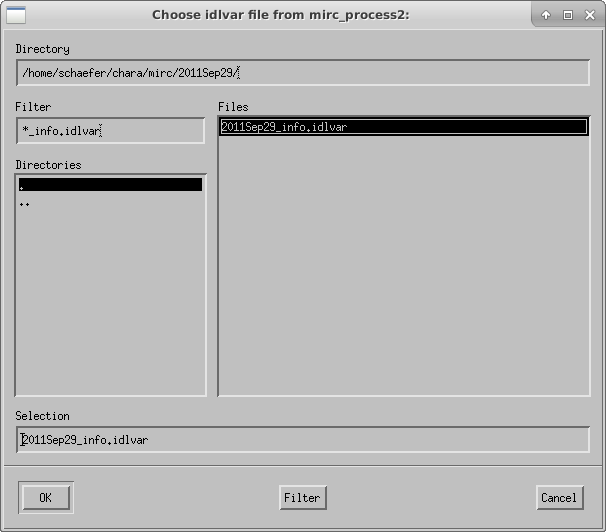
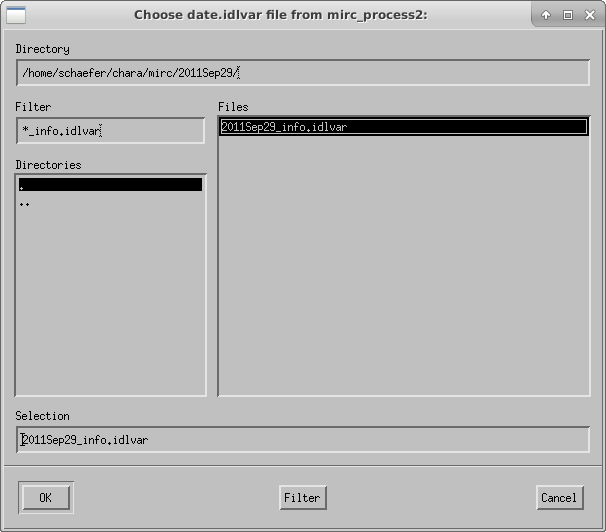
The script will ask the user to select the idlvar file created during mirc_process2:
The script then displays the profiles for data and xchan regions of the detector during the data and shutter sequences:
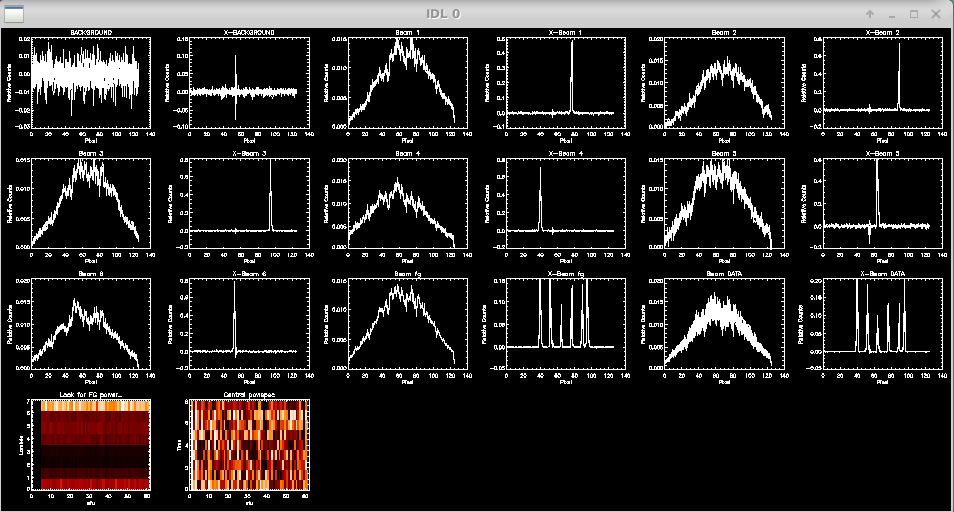
Check to see if light is on all of the beams and to make sure there are no fringes in the foreground frames. The script will prompt the user to flag missing beams or identify bad foreground frames. If all is good, then hit enter to continue.
OK? hit enter to continue
hit n to remove FG files due to fringes in the FG
hit numbers 1,2,3,4,5,6 to mark one beam as missing
HD_25490      12
:
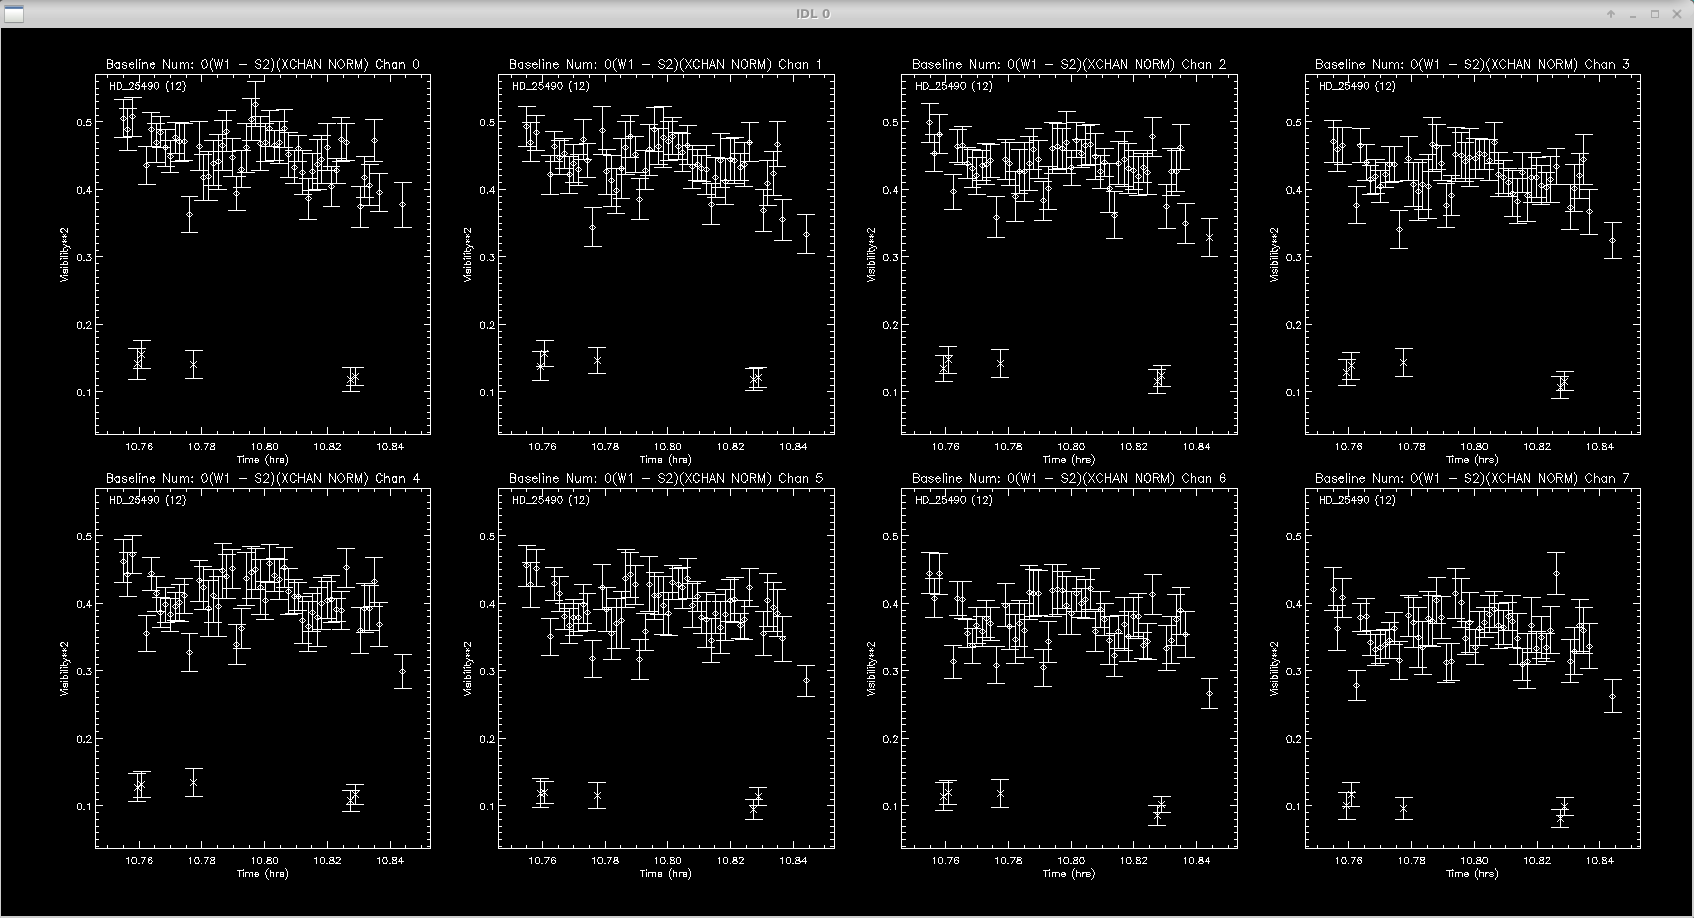
Next the script will plot the flux over time for each beam as measured from the photometric channels (xchan). The vertical dashed lines separate the data, shutter, and foreground files. The beam ratios are printed to the screen.
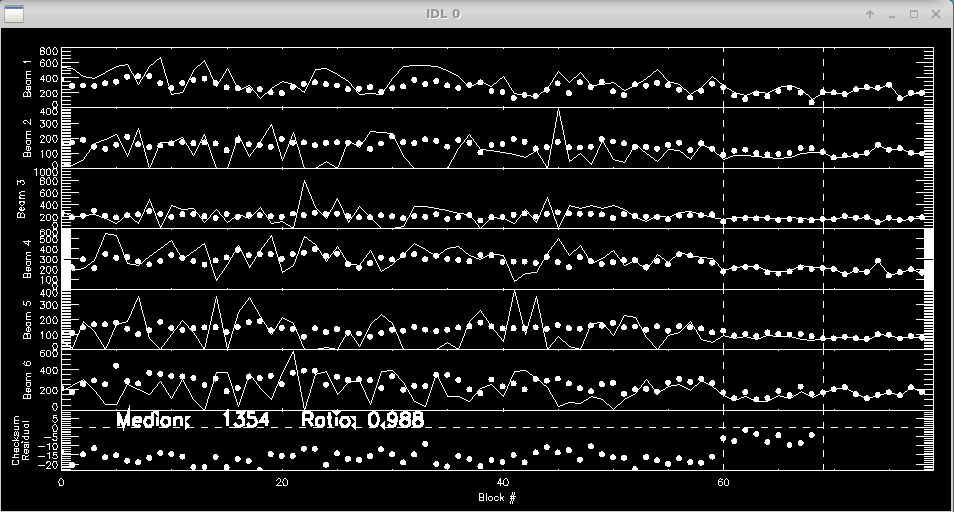
 Ratio Check:
Channel: 00   Ratio: 0.986 +/- 0.001
Channel: 01   Ratio: 0.987 +/- 0.001
Channel: 02   Ratio: 0.985 +/- 0.001
Channel: 03   Ratio: 0.989 +/- 0.001
Channel: 04   Ratio: 0.991 +/- 0.001
Channel: 05   Ratio: 0.992 +/- 0.001
Channel: 06   Ratio: 0.992 +/- 0.001
Channel: 07   Ratio: 0.983 +/- 0.001
 End of block loop. hit enter to continue
:
The script will loop through these profile and flux plots for each target.
Optimize fringe information for given combiner setup
Run mirc_process4.script to optimize fringe information for a given combiner setup. This step produces the date_comboinfo.ps file.
IDL> .r mirc_process4.script
The script will ask the user to select the idlvar file and will continue on from there:

Coherent Integration
Run mirc_process5.script to compute coherent integration. It is recommended to run this step twice, once with the default integration time of 17 ms and another time with a longer coherent integration time of 75 ms. The longer coherent integration time will improve signal-to-noise for faint targets. However, the shorter integration time might be necessary in bad seeing conditions to avoid biasing the visibility calibration. A comparison of the results between the two coherent integration times can help decide the optimal value. This step creates the date_tcoh0017ms_diagnostics.ps summary file.
IDL> .r mirc_process5.script
Enter coherent integration time
 (default: 17 ms; for faintest targets try 75 ms)
: 17
The script will ask the user to select the idlvar file:
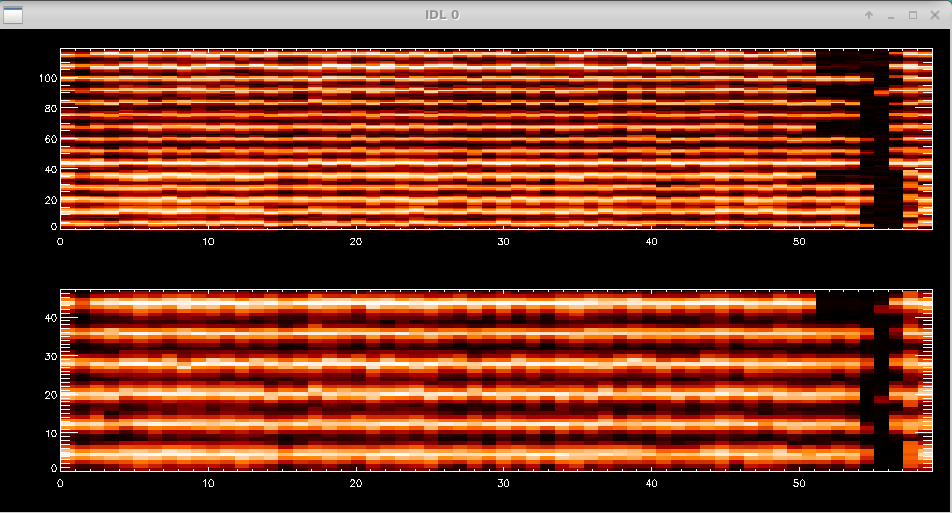
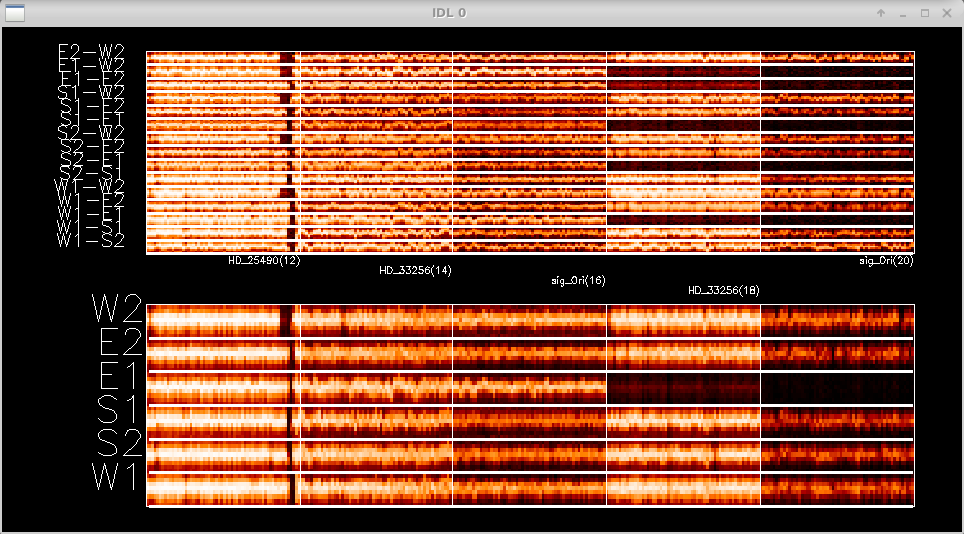
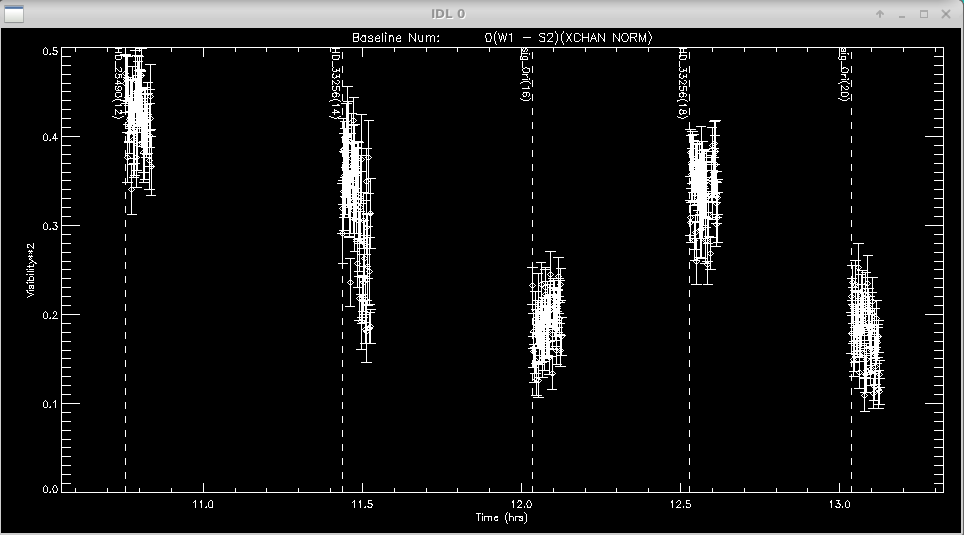
The script will then show the waterfall fringe plots for each target. The top panel shows the fringes for each baseline separately. The lower panel shows fringes summed over all pairs for each telescope. Dropouts from a particular telescope can be identified more easily in the bottom panel.
Data Editing and Averaging
Run mirc_average.script or mirc_average_sigclip.script to average data and remove bad data points. Both scripts allow the user to interactively remove bad data points. The sigclip version applies sigma clipping to automatically remove data points that are more than 3 standard deviations discrepant from the median. After sigma clipping, the user can still interactively reject additional data points. The sigma clipping option provides a less subjective way to remove discrepant data points. If you want to run a quick reduction without scrolling through all of the sigma clipping plots, then use mirc_average.script instead.
The data are averaged over a default time interval of 2.5 min. The routine will save raw level one MIRC_L1*.oifits and summary MIRC_LI*.ps files for each target in the OIFITS output directory.
IDL> .r mirc_average_sigclip.script

--- or ---

IDL> .r mirc_average.script
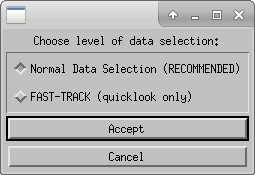
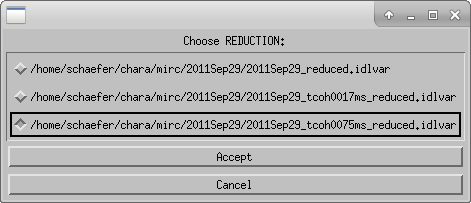
Choose the level of data selection (Normal Data Selection is recommended):
Choose the idlvar file:

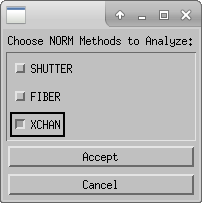
Choose normalization method to analyze. XCHAN is preferred, but can be compared to other flux methods if necessary:
Choose which reduction to process (e.g., 17 ms or 75 ms coherent integration time from the previous step):
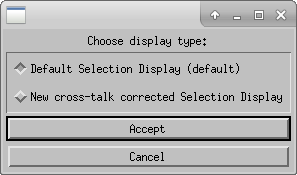
Choose display type (default):
Select the Maximum Averaging time (2.5 min is the default):

Next you can edit data based on the fringe waterfall plots. The top panel shows the fringes for each baseline separately. The lower panel shows fringes summed over all pairs for each telescope. Dropouts from a particular telescope can be identified more easily in the bottom panel. The target name is written for each panel. Follow the instructions on the terminal window to edit fringes.
 Double click in a square to flag whole block as bad (<0.5 sec)
 Click twice over a range to flag a specific RANGE
 Click to the right of plot to REPLOT (allows to resize window)
 Click below all plots to reset bad flags!!
 Click to the left of plots to continue..
Next you can edit data based on the flux from each telescope. The pipeline loops through the flux rejection for each telescope. Follow the instructions on the terminal window to edit any dropouts in flux.
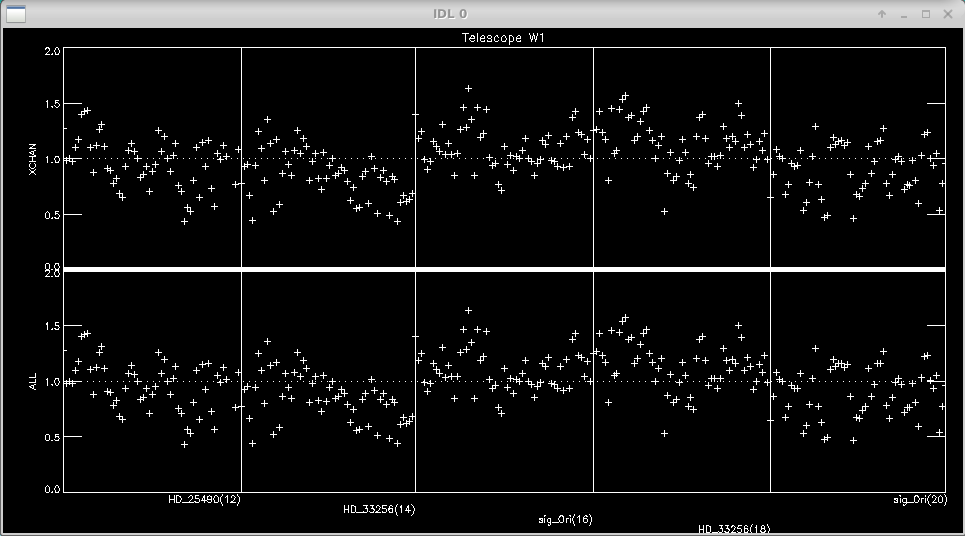
 Double click in a square to flag whole block as bad (<0.5 sec)
 Click once to mark a single point as bad
 Click to the right of plot to REPLOT (allows to resize window)
 Click below all plots to reset bad flags!!
 Click to the left of plots to continue..
Next the script will ask if you want to apply sigma clipping to the visibilities. It will loop through each baseline and show a plot for each target. The panels show the data in each of the 8 spectral channels. Follow the instructions on the screen to change the sigma clipping parameters and press enter to reject the clipped measurements after each plot.
Would you like to apply sigma clipping?
(applies to visibilities, closure phases, and closure amplitudes)
<Y>  or N
: Y
Sigma clipping rejection threshold (N*stdev):
      3.00000
Would you like to change rejection threshold?
Y of <N>
: N
------------------------------
Sigma clipping of visibilities
Rejection threshold (N*sigma):       3.00000
NOTE: Edge channels will not be used to apply sigma clipping flags
Hit enter to continue
:
Block:       12  Source: HD_25490
Diamonds - good data; X - sigma clipped
Number of measurements on target (per spectral channel):
          57
Maximum number of sigma clipped measurements per spectral channel:
      7.00000
Number of uniquely rejected measurements (not including edge channels):
       7
Do you want to reject these measurements?
<Y> or N:
:
 Calculating Calibration Table for All Spectral Channels...
----------------------------------------
Finished sigma clipping the visibilities.
Begin visual inspection and flagging of visibilities.
Hit enter to continue
:
The next step is the interactive data editing. The script will loop through each baseline and show all targets in only one spectral channel. The sigma clipping routine will remove most of the outliers, but its good to double check and edit where needed. Follow instructions on screen to remove data points.
 Click left of axis to continue (or to goback to unzoomed view)
 Click right of axis to change smoothing length
 Click near datapoint to remove a time sample.
 Click below axis twice to specify a range to remove.
 Click above plot twice to specify a range to ZOOM up
The same procedure of sigma clipping and interactive editing is then repeated for the closure phases and triple amplitudes on all closure triangles.
Data Calibration
The last step runs mirc_cal.script to calibrate the science data using the calibrator observations and estimated calibrator diameters.
IDL> .r mirc_cal.script
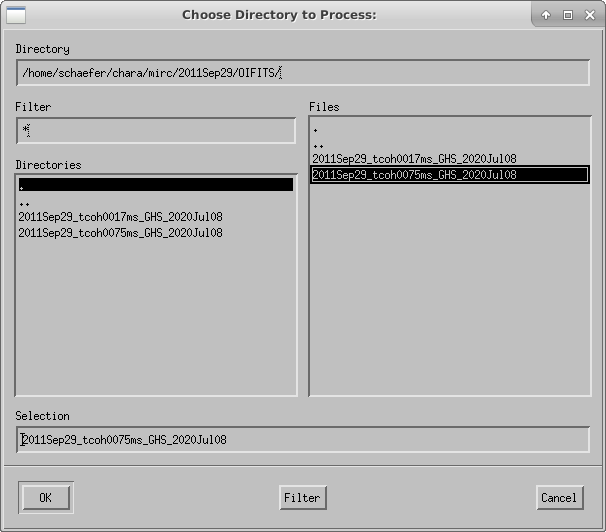
The script will ask the user to choose the directory to process:
A plot of the target elevation vs time is shown:

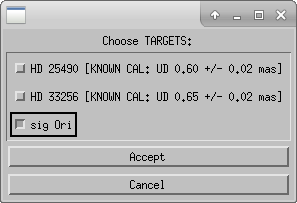
Next the user will select science targets and then calibrator stars from the list of stars observed during the night. The user can choose to process science targets and calibrators located in the same region of the sky by selecting only those stars from the list.

The routine will search the mirc_calibrator.txt file to find the calibrator diameters. If a calibrator is not included in the file the routine will query the user for the diameter. After the diameters are read from the file, the user will confirm the adopted diameters in the terminal window.
 CALIBRATOR DIAMETER FOUND:
 target  udsize (mas), err: HD 25490     0.599000    0.0200000 (SED_Fit_HD25490)
 Would you rather use an alternative calibration model?
Y or <N> :
 CALIBRATOR DIAMETER FOUND:
 target  udsize (mas), err: HD 33256     0.655000    0.0180000 (SED_Fit_HD33256)
 Would you rather use an alternative calibration model?
Y or <N> :
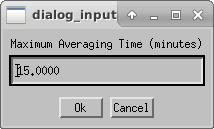
Next the user will choose the maximum averaging time for an observing block (default is 15 min). The user might consider increasing the maximum averaging time if a single set of observations on a target took longer than 15 min. The length of an observing block is typically between 10-30 minutes.
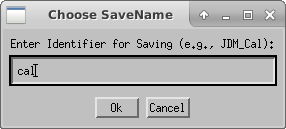
Enter the file extension for saving the calibrated oifits files. If you need to re-run the calibration, you can change the extension to avoid copying over existing files.
The program will make plots of the calibrator and target visibilities vs. time for each baseline. The transfer function is overplotted. The options printed to the terminal window allow the user to cycle through the wavelength channels and to flag bad data points.
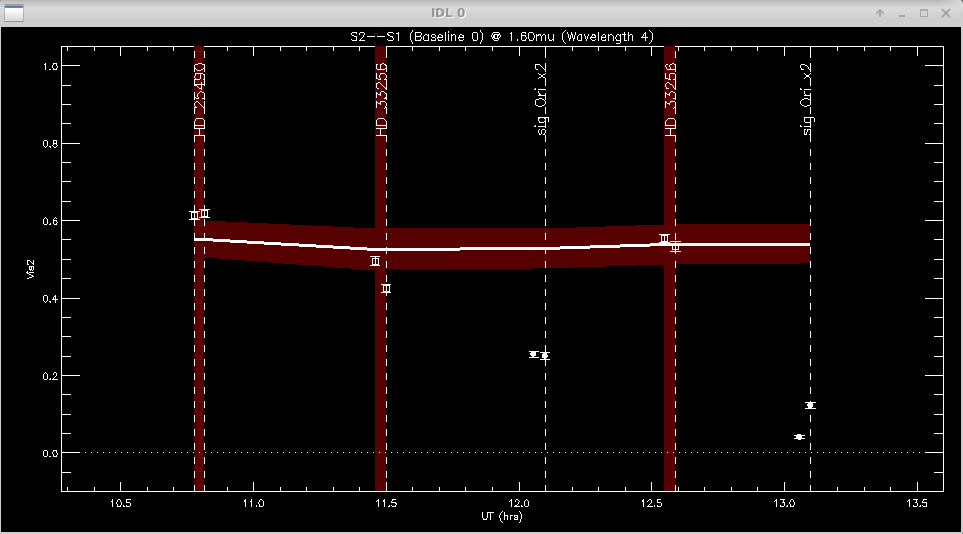
 Click left of axis to continue to next baseline
 Click near point to remove it (be careful: there is no UNDO)
 Click above graph to cycle through wavelengths
 Click to the right to change the xfer function parameters (timescale, sky_scale)
 Click time range below axis to see an alternative view of
     multi-wavelength calibrated vis2 for data selection / bad flagging convenience
It is useful to zoom in on a particular target or calibrator to view the visibilities over all wavelength channels. The first and last wavelength channels sometimes show low signal-to-noise, particularly for faint targets, and might need to be removed.
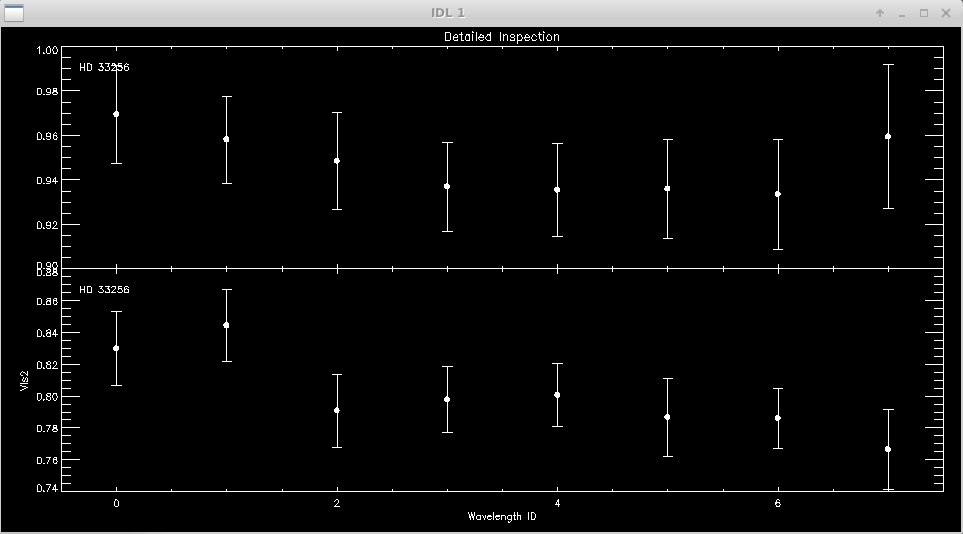
Click next point:
WINDOW 1 OPTIONS:
  Click near point to remove it (be careful: no UNDO)
  Click left of axis to return
  Click below axis to mark ALL POINTS AS BAD (NUCLEAR OPTION)
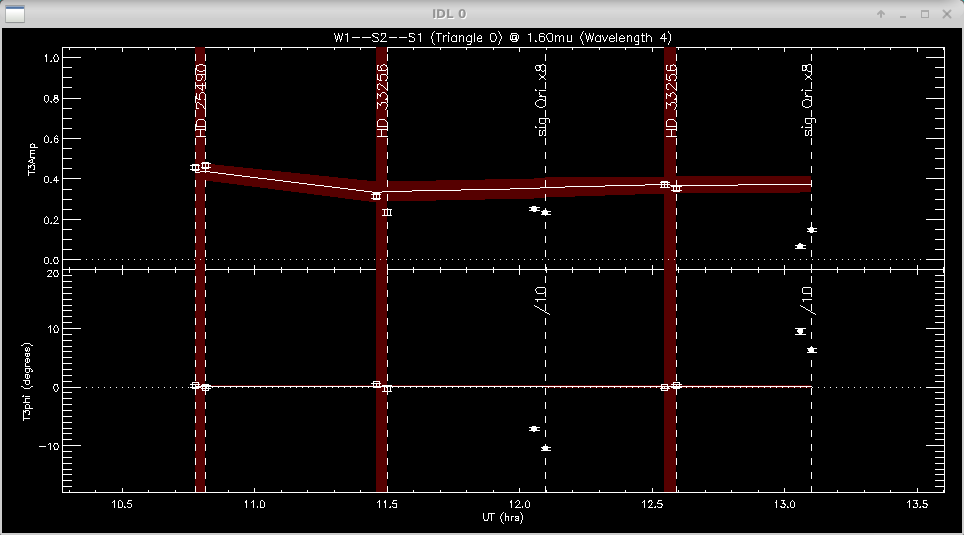
The same process is repeated for the closure phases (T3phi) and triple amplitudes (T3amp) for each closure triangle.
When completed, mirc_cal.script will save calibrated MIRC_L2*oifits and summary MIRC_L2*ps files for each science target in the selected OIFITS directory. For each target, the program produces two calibrated OIFITS files: the AVG15m.oifits are averaged over the 15 min observing blocks set in mirc_cal.script and SPLIT.oifits splits each observing block into 2.5 minute chunks of time defined by the averaging time set in mirc_average.script. The summary ps files contain plots of the uv coverage, vis2 vs baseline, vis2 vs wavelength for each baseline, CP vs wavelength, and T3amp vs wavelength for each closure triangle. The script also produces a file called XFER.XCHAN.cal_*.ps that plots the transfer fucntion for each baseline and closure triangle during the night.
Applying Standard MIRC Calibration Errors
After the reduction process is complete, run oifits_prep.pro to apply the standard MIRC calibration errors to the visibilities, closure phases, and triple amplitudes. The file created during this step should be used in subsequent analysis.
IDL> oifits_prep
The program will ask the user to select the calibrated oifits file. Multiple files can be selected if you want to merge separate observing blocks on the same target. Hit OK to add another file or Cancel to continue.

Recommended calibration errors for 6T and 4T data are listed below:
Vis2 Error multiplier: 1.5 (default, use 1 to apply uniformly to all measurements)
Min Vis2 Additive Error: 0.001 (default)
Min Vis2 RELATIVE Error: 0.05 (use 0.05 default for MIRC-6T, use 0.10 for MIRC-4T no xchan)
t3amp Error multiplier: 1.5 (defaut, use 1 to apply uniformly to all measurements)
Min T3AMP Additive Error: 0.0002 (default)
Min T3AMP RELATIVE Error: 0.10 (default)
Min T3PHI ADDITIVE Error (degs): 0.30 (default)
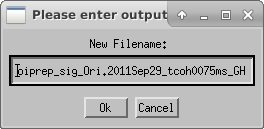
The user then enters the output file name.
The file created during this step can then be used in subsequent analysis.
The reduction process is finished! Good luck with the model fitting, imaging, and analysis!